
HOW TO 3D VISUALIZATION
Publisher
Tisková zpráva
11.05.2021 21:10
Tisková zpráva
11.05.2021 21:10
In this article, we will describe how to create 3D visualizations as simply and quickly as possible using the SketchUp and Lumion programs. In our opinion, these two software options are the easiest and best for users who want to quickly create impressive photorealistic visualizations. This tutorial is designed not only for architects, designers, and visualizers, but also for students in high schools and universities.
 |
| Example of a created 3D visualization after 1 hour and 35 minutes of work in SketchUp and Lumion. |
3D MODEL
To create a 3D model, we first need to find a suitable 3D modeling program – in our case, SketchUp, which is the most accessible and widespread worldwide. You can create the entire building, terrain, paved areas, as well as individual landscaping elements and outdoor or indoor furnishings. (Details on current SketchUp licenses are below the article.)CREATING A 3D MODEL
Throughout the process, it is essential to remember that for a visualization program, a simple 3D model is better. This is, of course, an advantage for SketchUp, which will not be overloaded with a simpler model. Because Lumion calculates the details of the 3D model graphics and/or contains high-quality 3D models, you do not need to model fine edges, stone cladding and walls, fabric undulations, fur, grass, and greenery in general. In the 3D model, you only create the basic mass.
 |
– Floor plan and walls
You can create the 3D model in SketchUp completely from scratch. If you already have an idea of what your object should look like, take the "Line" or "Rectangle" tools. With their help, you outline the building. Next, using "Offset," you give the perimeter walls thickness and can begin working on the internal load-bearing and non-load-bearing walls using "Line." Once we have prepared the layout of the object in a 2D plane, we use the "Push/Pull" function to extrude the object upwards. This way, you can create the 3D skeleton of the model with one click.
 |
Similarly, we can continue with additional floors. The ceiling is created similarly to the floor plan; we simply set the desired thickness. If you want to simplify your work from the start and avoid drawing lines and surfaces, definitely check out the "Dibac" plugin: https://www.dibac.com/shop/dibac-for-sketchup-solid-section-included/
It's a good idea to distinguish different materials right from the beginning, which we will then assign appropriate textures in the visualization program.
– Windows and doors
On the walls, we indicate the sizes and locations of windows using the "Rectangle" function, and we pull these areas through "Push/Pull" to the opposite side of the wall – thus creating an opening. We then place a surface in the opening through "Rectangle" at the position where we will have the window frame.
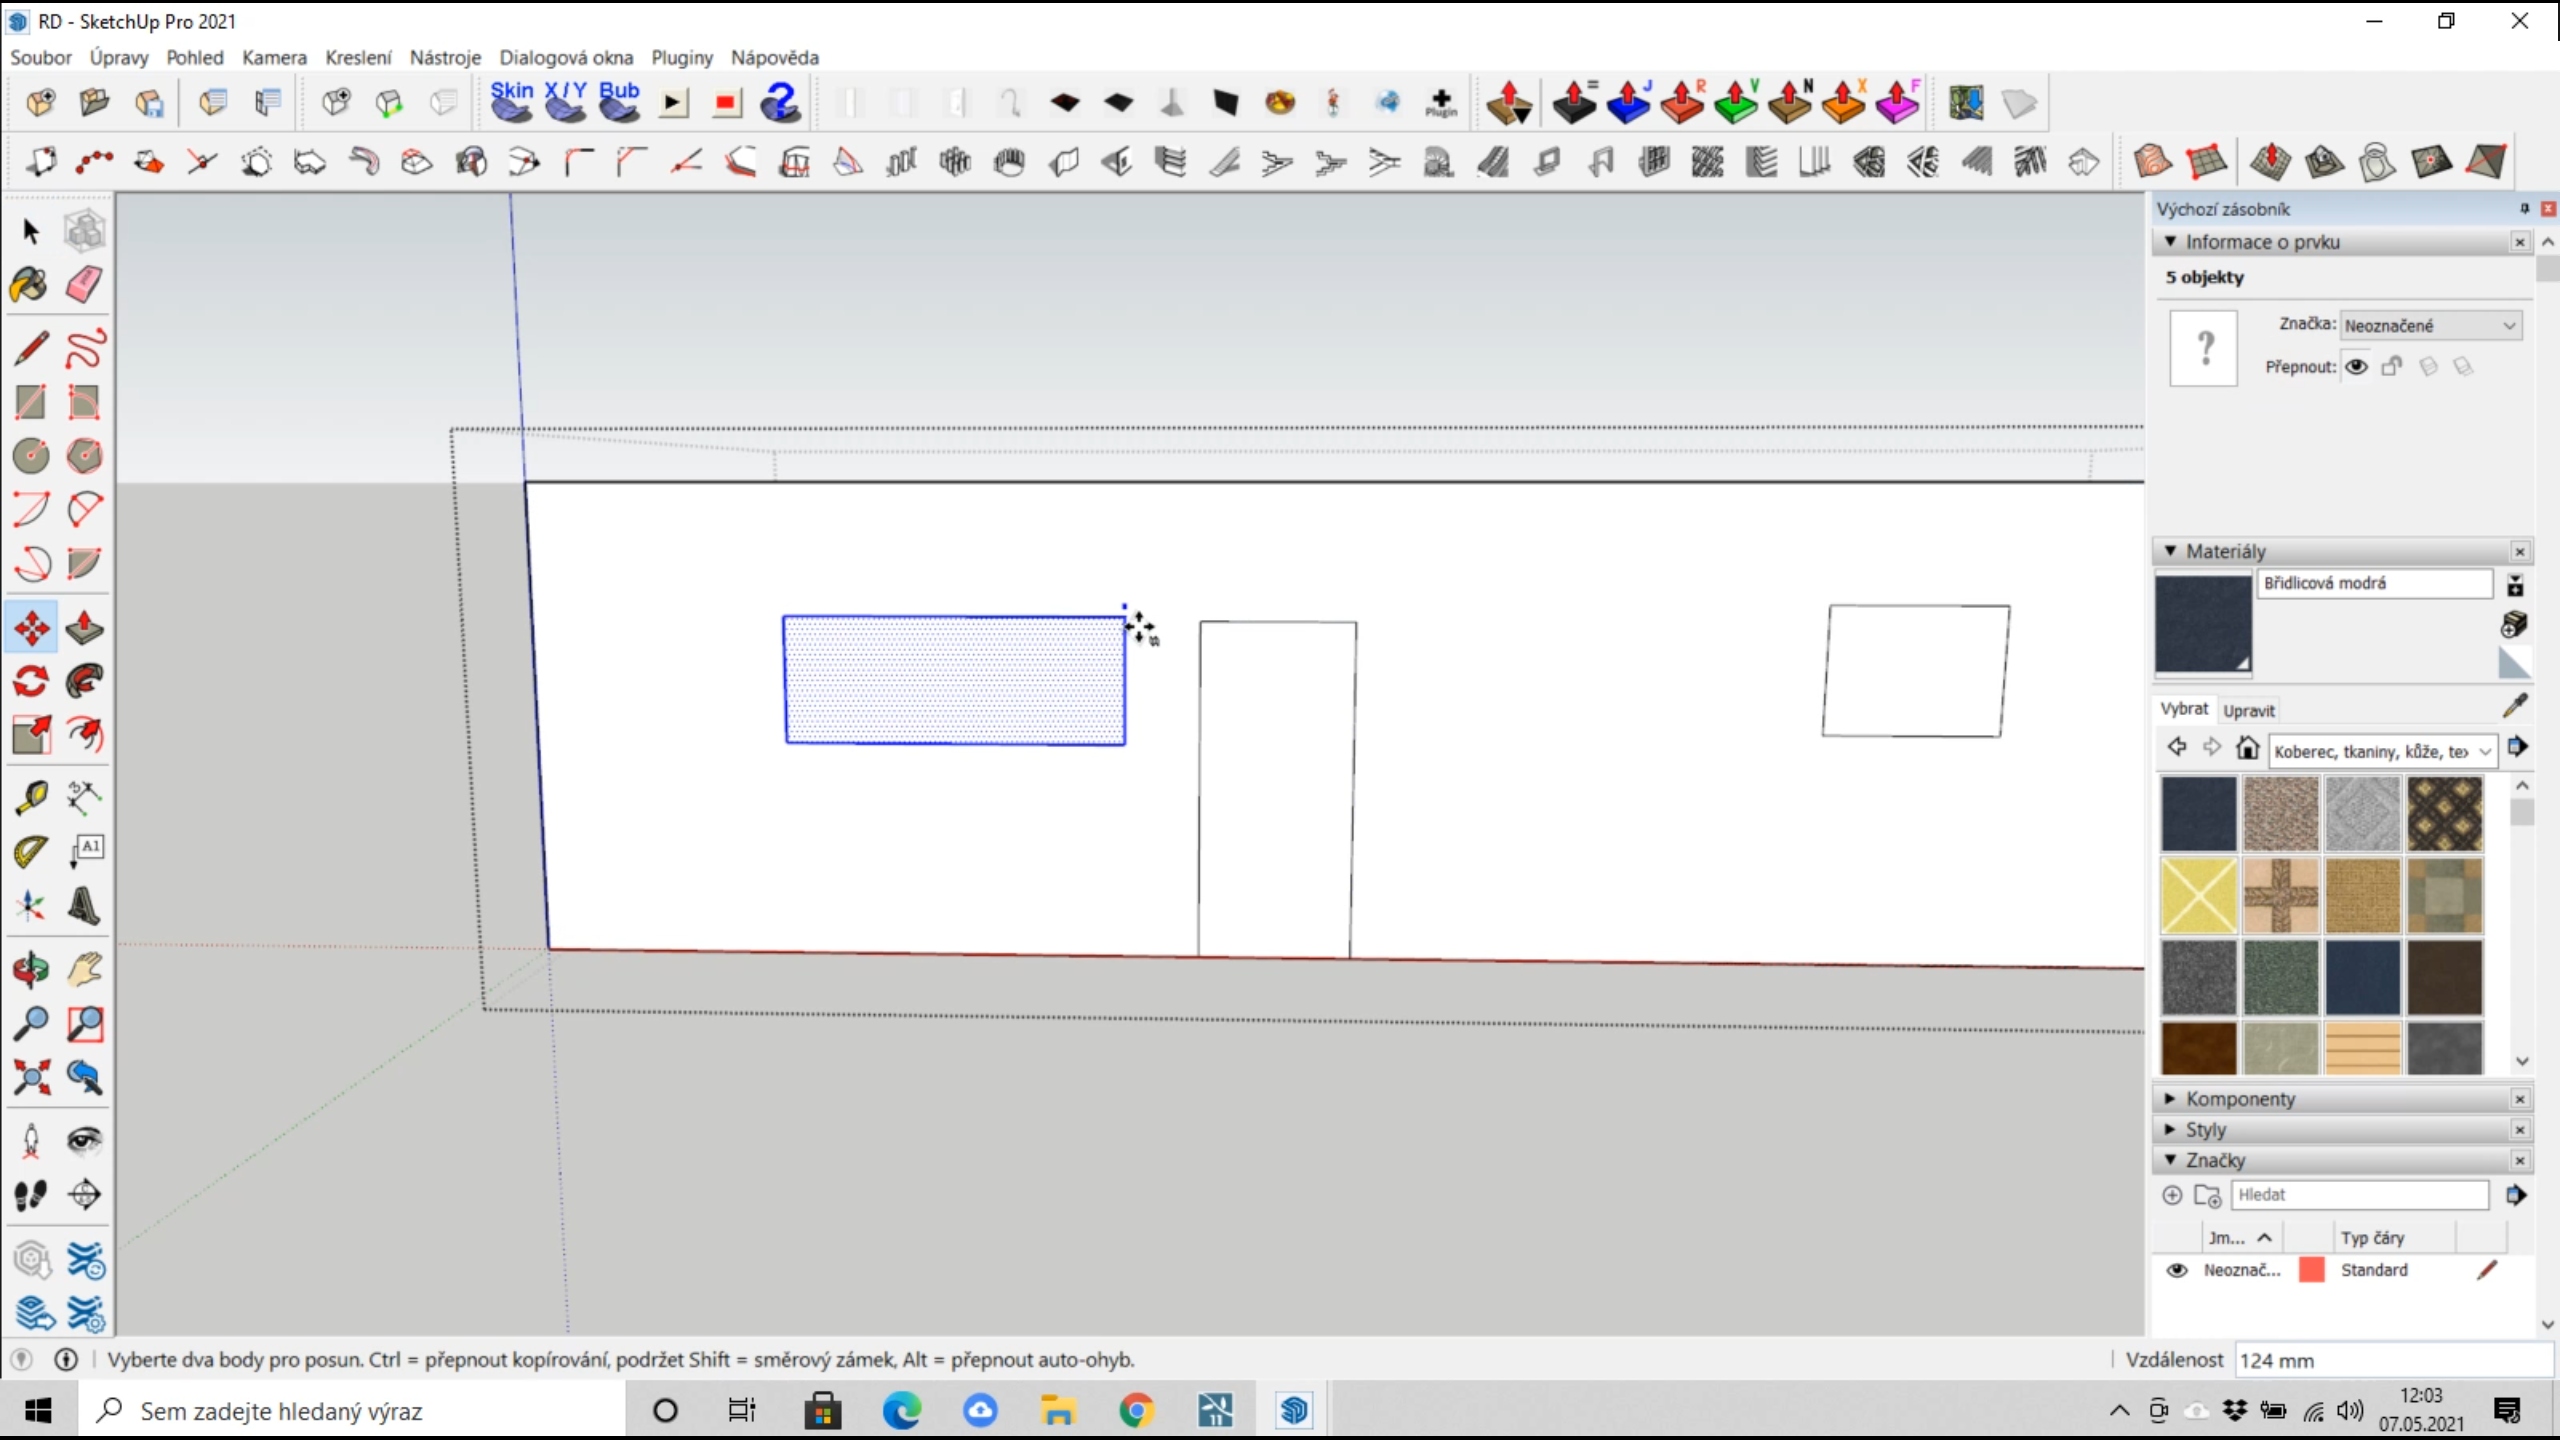 |
Now we will speed up the work a little and use the "1001bit tools" plugin (https://extensions.sketchup.com/extension/1001bit-tools-freeware), which allows us to quickly create window frames, including their divisions. This plugin is a powerful tool and allows you to create stairs, slats, roofs, trusses, detailed elements, etc.
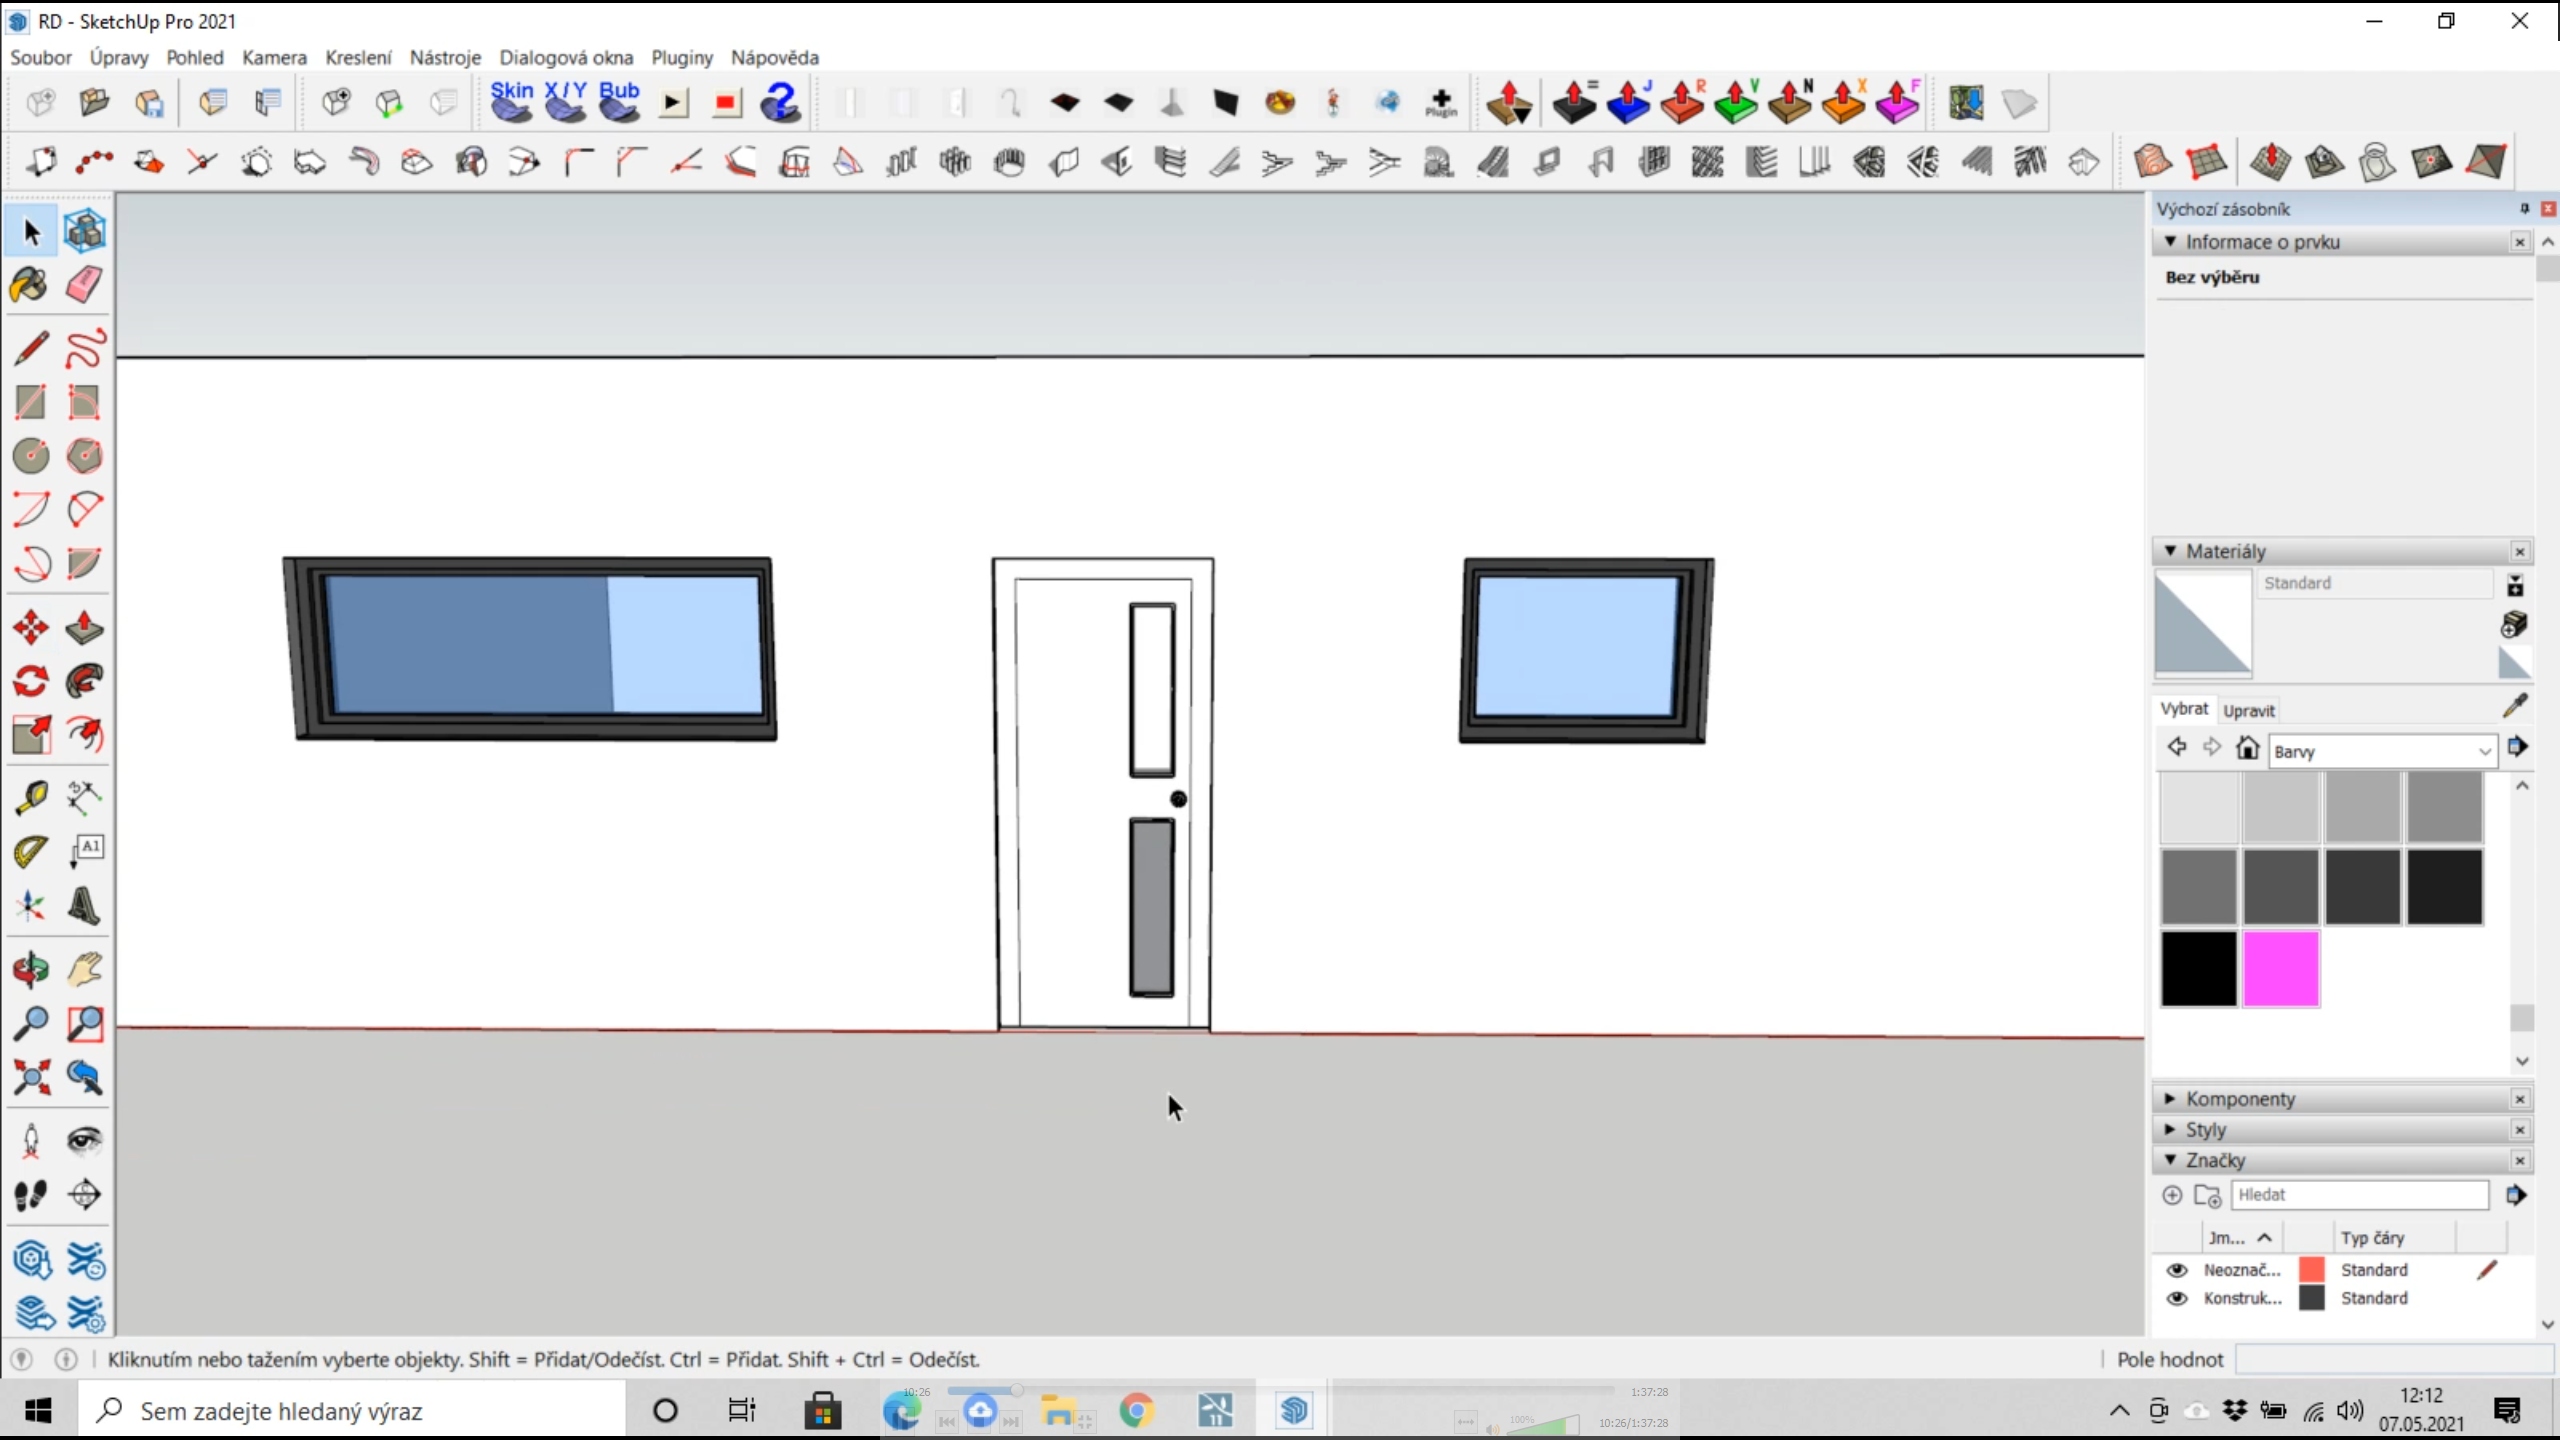 |
It’s best to model one window, save it as a group "Group," and create a component "Component" from it. Components have the advantage that if you change one window, all of them, which are components copied in the 3D model, will change.
You also have the option to use the "3e windows and doors" plugin directly from the Czech distributor of SketchUp: https://sketchup.cz/pluginy-pro-sketchup/.
Finished 3D window models can be downloaded from the 3Dwarehouse site, and you can edit them to fit your project: https://3dwarehouse.sketchup.com/
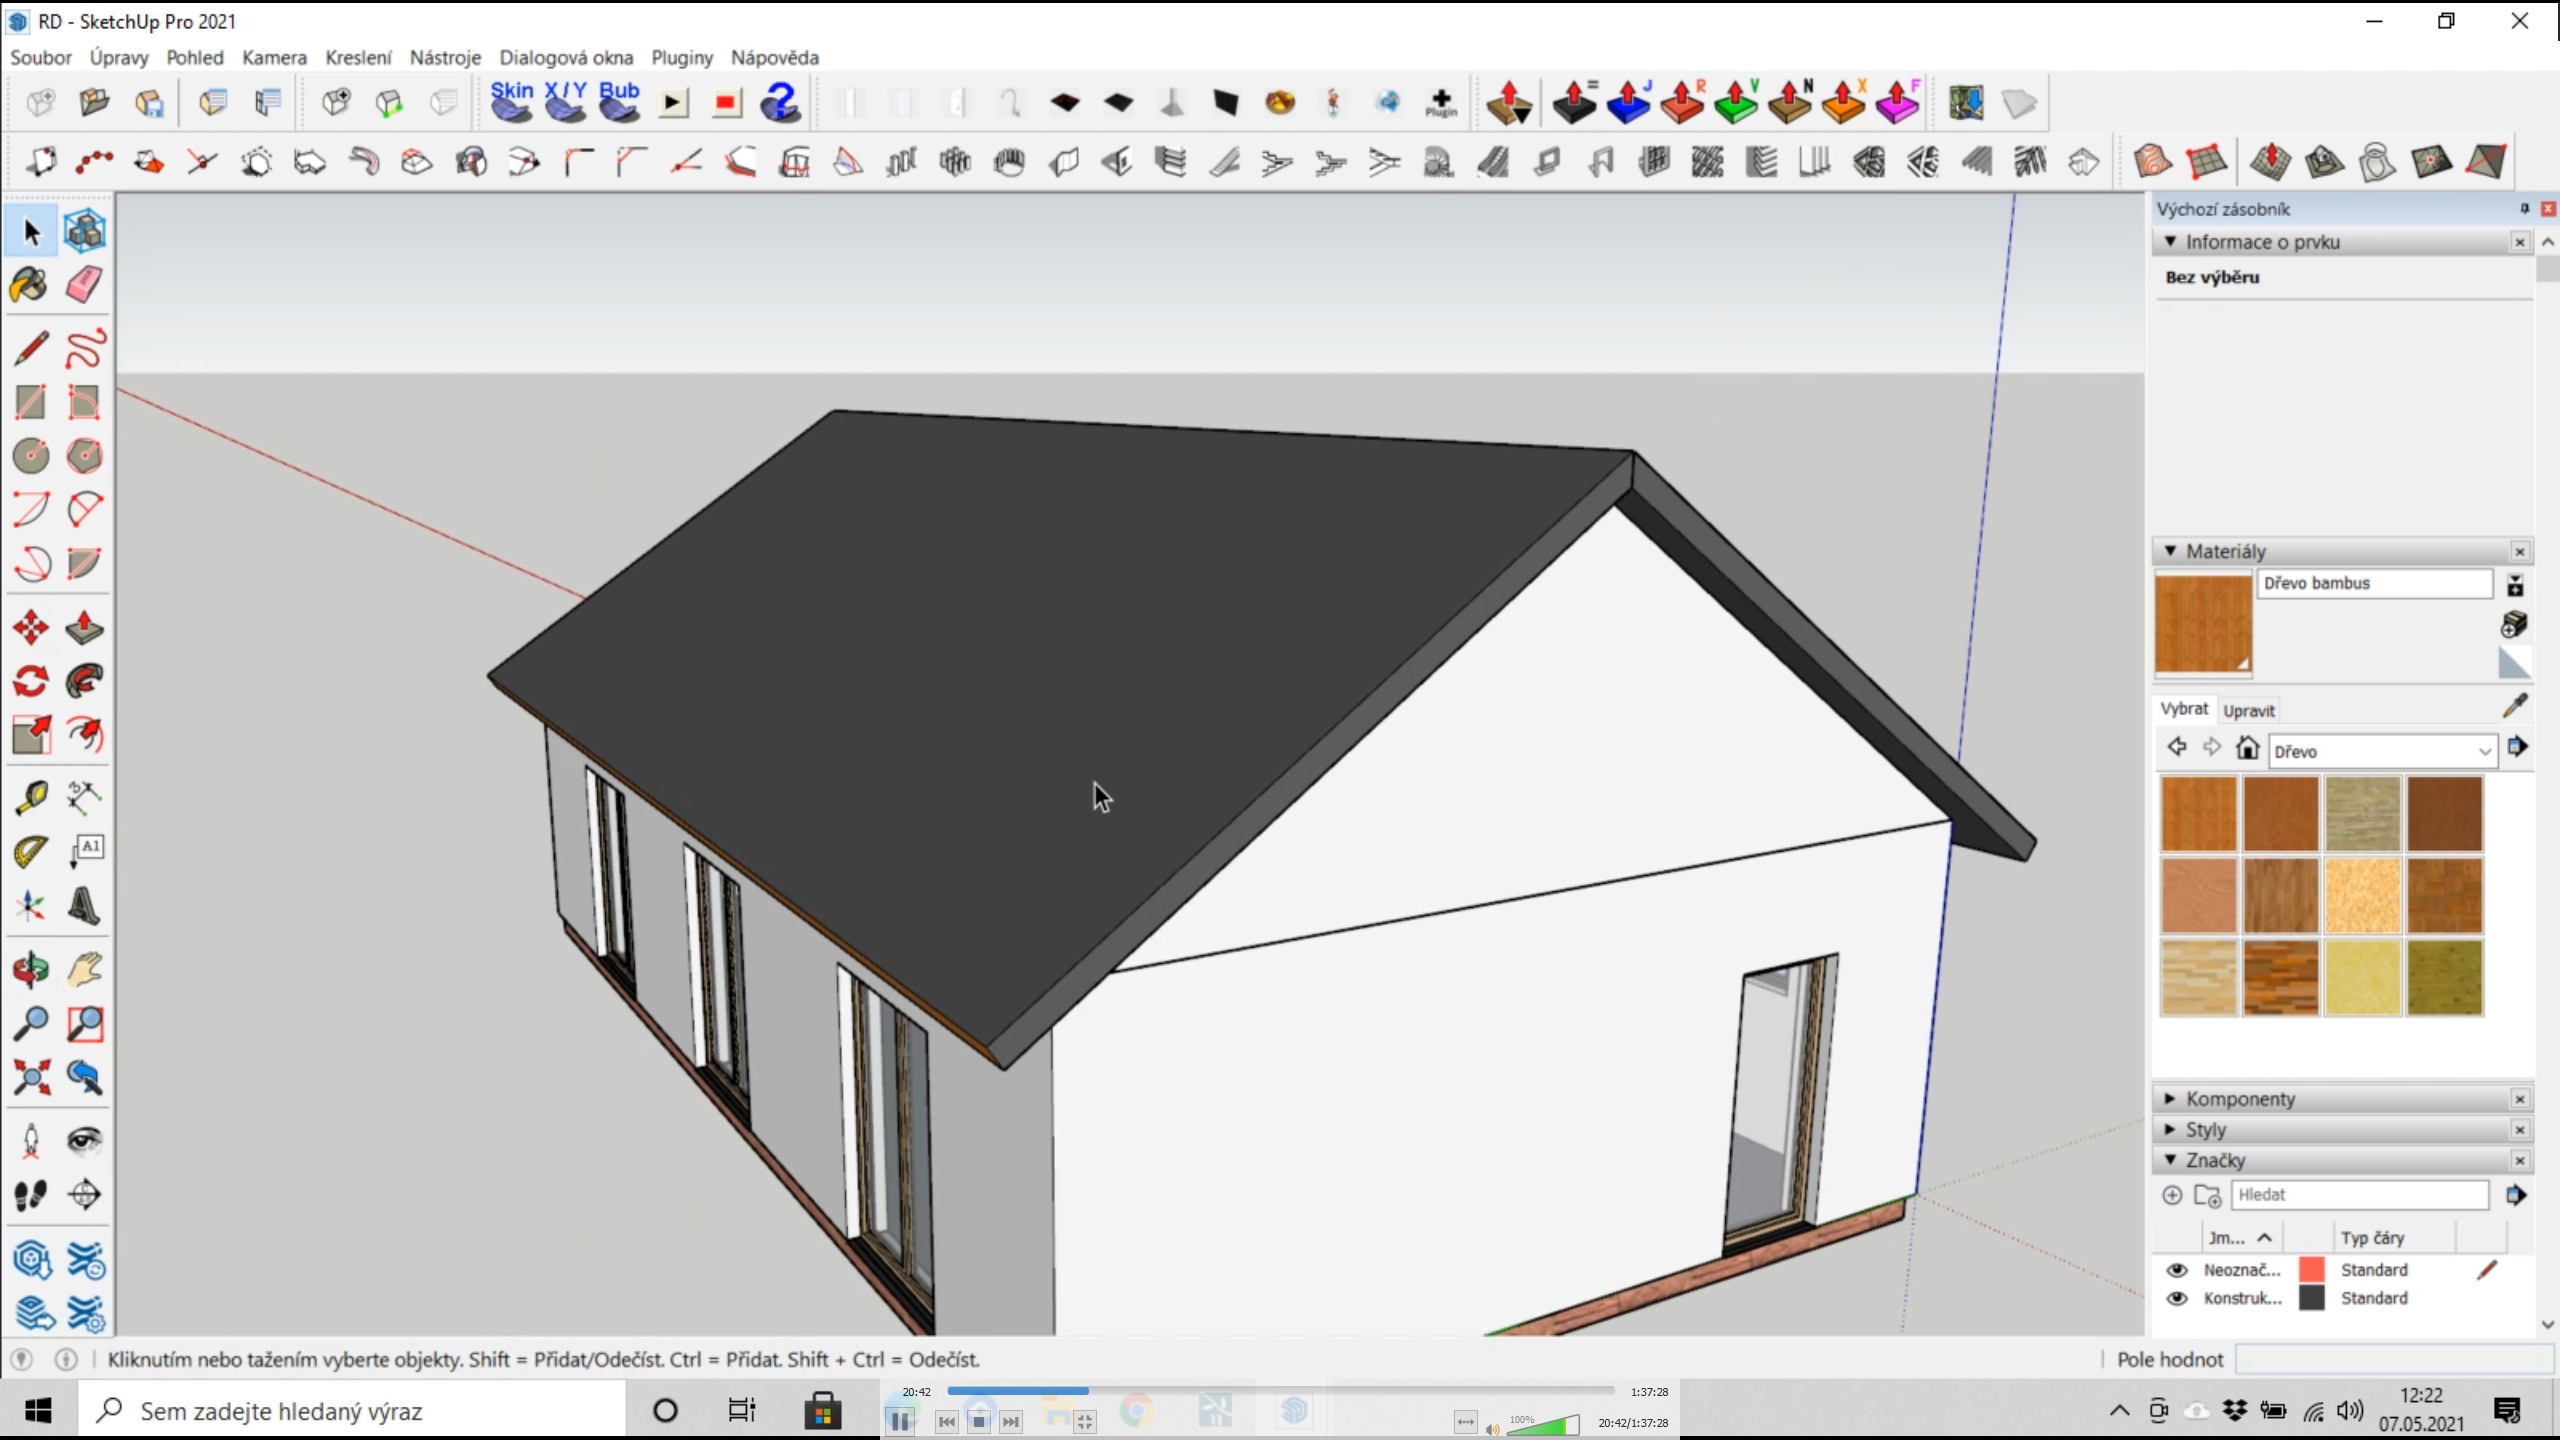
– Roof
You can create the roof either using surfaces, lines, and the move or pull functions, or you can use the previously mentioned "1001bit tools" plugin, which can create gable and hipped roofs as well as trusses. You can then adjust these into a more accurate shape and position to match your project.
If we need a detailed 3D model, it is good to arrange the roof tiles from 3D models, but such a model is not suitable for visualization. To achieve a realistic roof covering, it is advisable to use a texture that has a "Displacement map," which allows us to create a realistic imitation of a 3D model with shadows from a flat 2D object.
 |
– Paved areas and terrain
We create paved areas similarly to the floor plan by pulling sidewalks, roads, and pools, etc., into the 3D model. The terrain in SketchUp is somewhat a separate chapter, and we recommend checking out tutorials on YouTube. We mainly use the "Sandbox" Toolbar, where you can nicely work with the terrain using grids and circles. The "Sandbox" Toolbar can also work with contour lines, allowing you to process the terrain according to maps or contour lines.
 |
SketchUp also has advanced features and plugins that can extract terrain from a 3D point cloud sent by a surveyor. You can also download 3D terrain for free from sites like Cad mapper: https://cadmapper.com/, where the terrain accuracy is +/- 3 meters. The procedures in other 3D modeling/CAD programs are different, so we recommend watching individual tutorials on YouTube, which you will surely find for the given program.
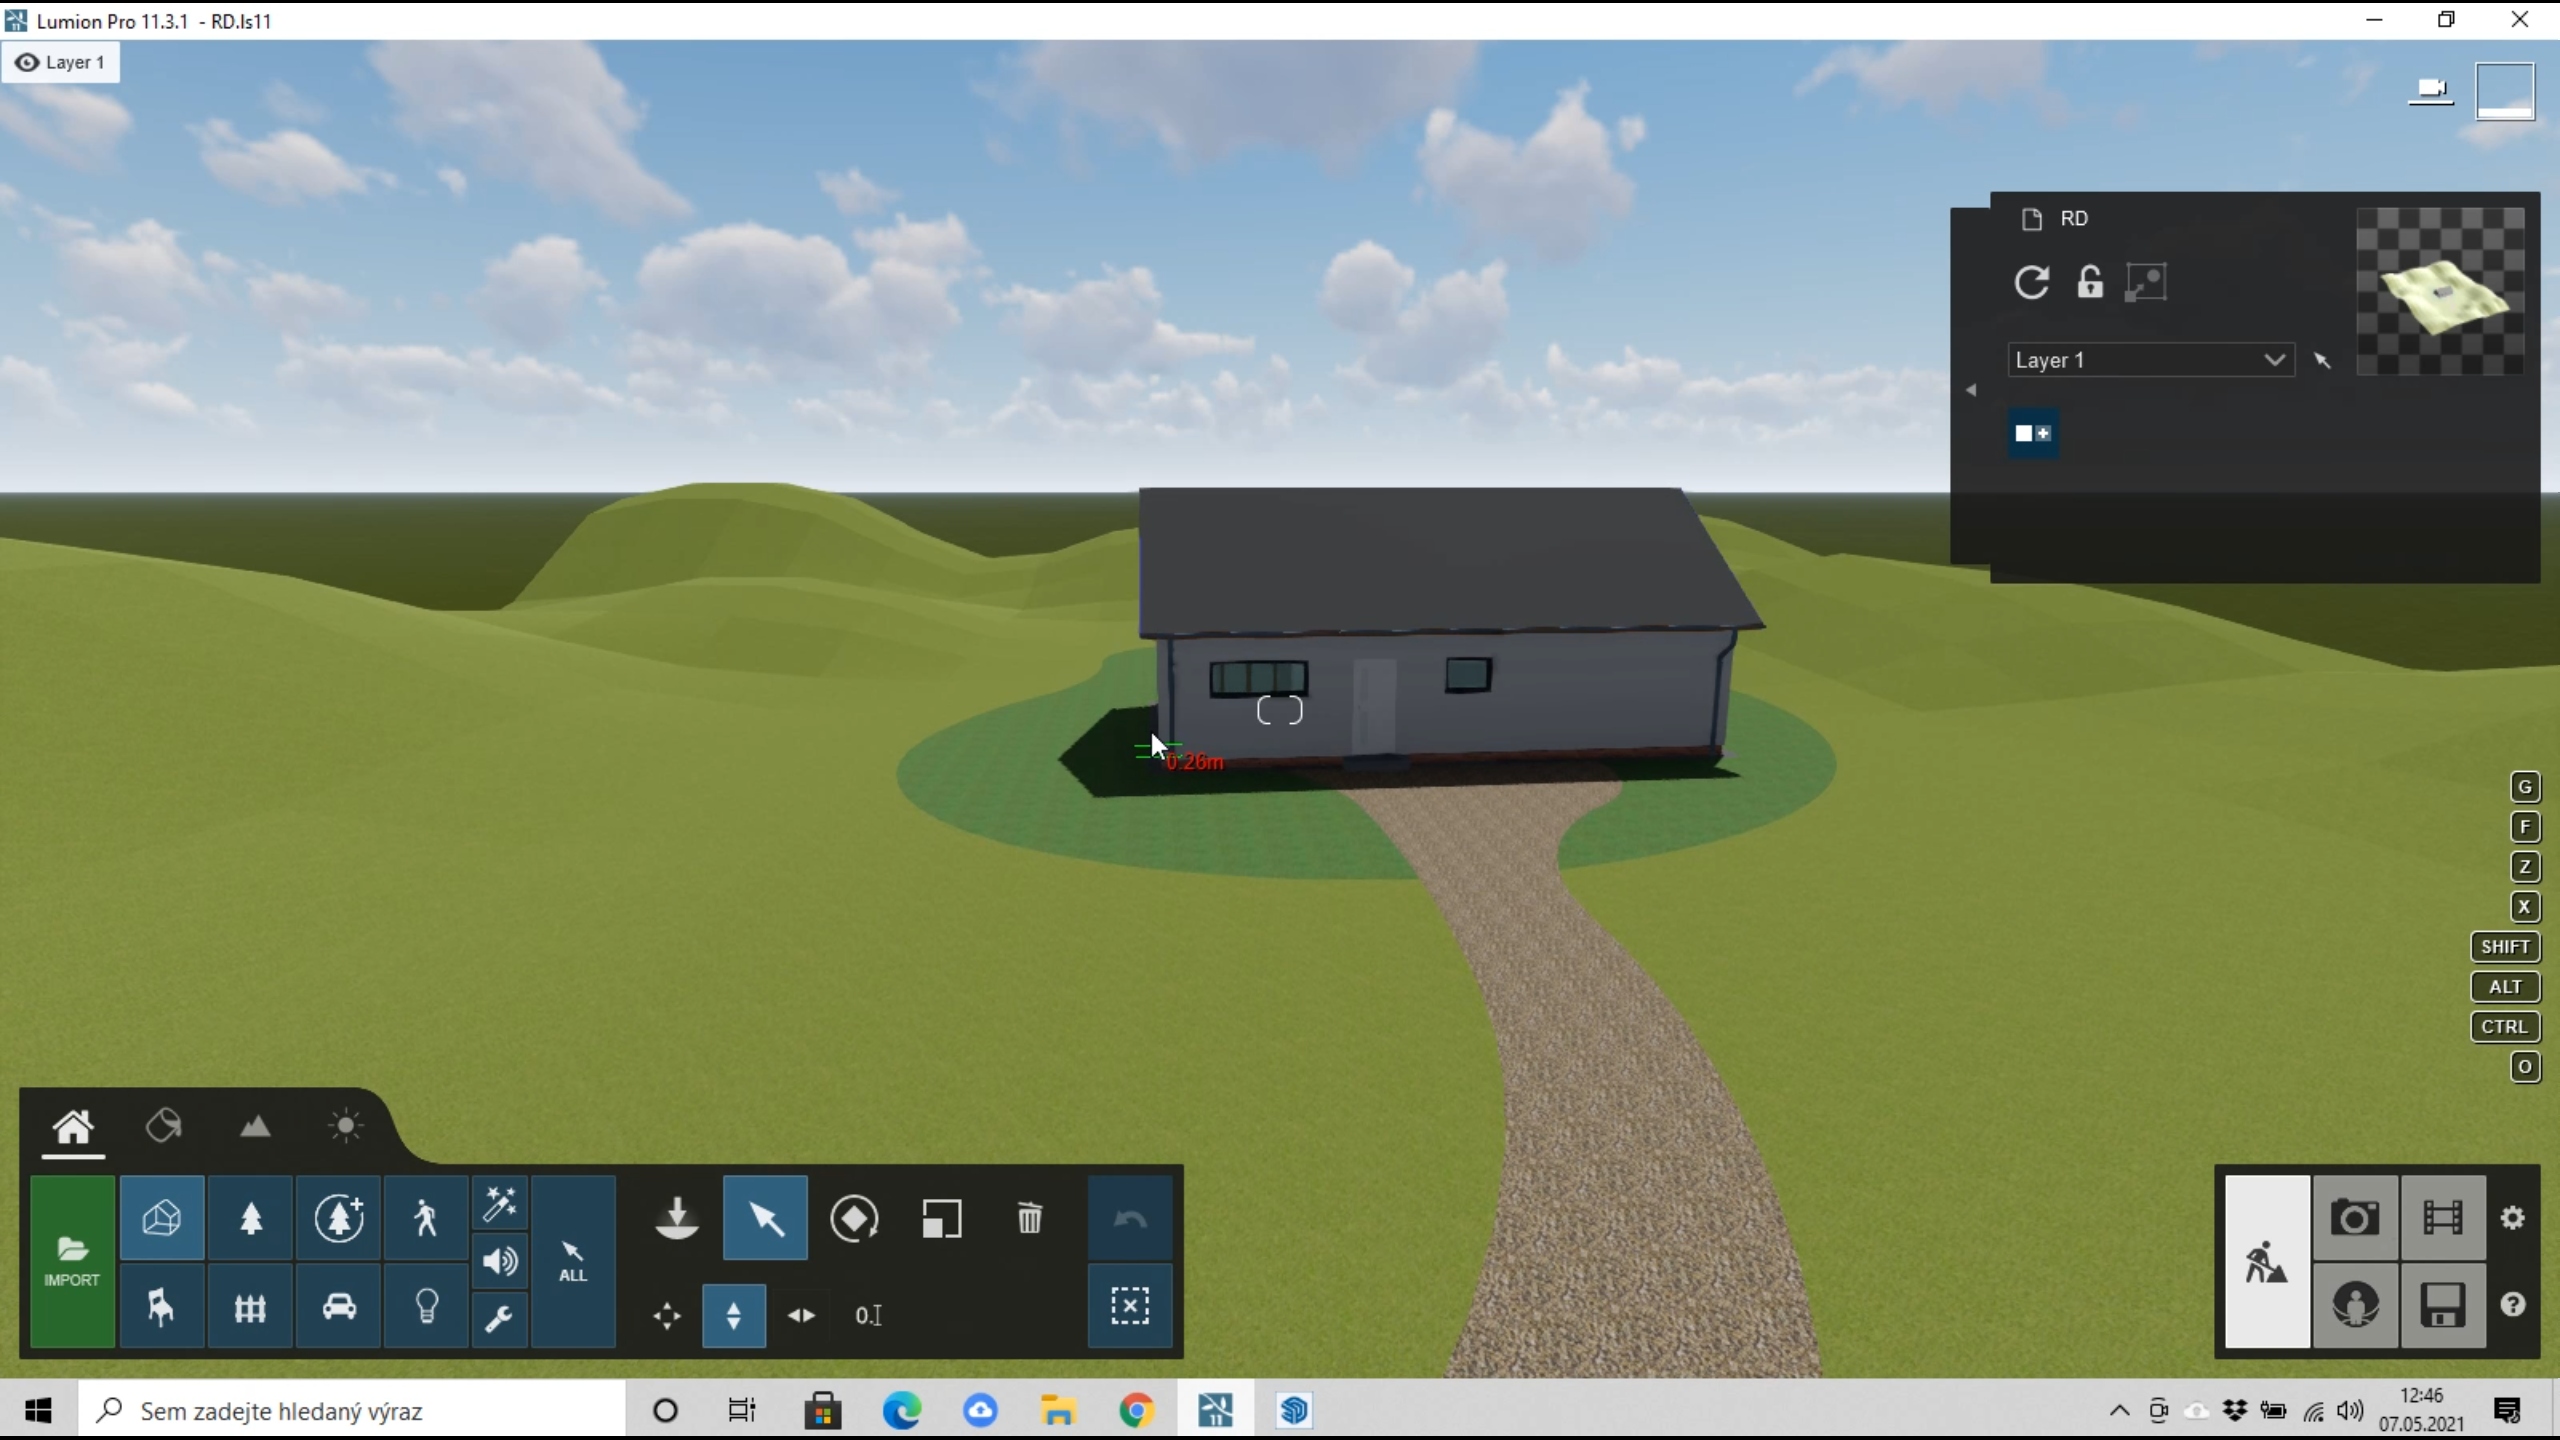
VISUALIZATION
Once we have created the 3D model, we can proceed to the actual visualization, for which we will use the Lumion visualization program. Lumion is a modern visualization program, which was likely the very first one to start utilizing graphics cards directly for rendering architectural visualizations. Its main advantage lies in its simple and intuitive control and incredible speed.CREATING A 3D VISUALIZATION
– Importing the model
Upon launching Lumion, we select "Create new" and choose a preset landscape for creating our scene for visualization. As soon as the scene opens, we click "IMPORT" in the lower left corner and import our 3D model from SketchUp. After loading, we simply place it into the scene.
To load and work with the 3D model, we can use the super feature, the "LiveSync" plugin from Lumion. It immediately synchronizes changes made to the 3D model into Lumion. This way, you can have SketchUp on one half of the screen and Lumion on the other, and immediately see your changes to the 3D model.
 |
– Texturing
After importing the model, we go to texturing through the "Materials" function. After clicking on the surface of the 3D model that we want to texture, a panel with materials appears in the lower left corner of the screen. We can choose a material from the basic set, or via the bars, select the category of material. In
The English translation is powered by AI tool. Switch to Czech to view the original text source.
0 comments
add comment